Showing posts with label cistern. Show all posts

Monday, May 14, 2012

How does your garden grow?

The garden was planted a little over a month ago, and I’m amazed at how fast things have grown. Since this is the first garden I’ve ever had, I don’t have a point of reference for plant growth patterns; I suppose they’re growing at typical rates that just seem fast to me.

The arugula is ready for harvesting, so last week we had a peppery arugula salad with pear, prosciutto, goat cheese, olive oil, and honey. It was great to be able to pick a few dollars worth of produce that started out from a $2.00 seed packet.


The red cabbage and cauliflower leaves are as big as my hand; they’re in the front of the first box. Carrots and rainbow chard, also in the first box, will probably be ready in two to three weeks.


There are five tomato plants, and one has about six tomatoes growing on it. The others are starting to bud and should be bearing fruit soon. One of my favorite scents is a tomato plant (or a tomato fresh off the vine); I find myself lingering by the tomatoes when I water the garden, and will rub one of the leaves to help release the scent.


I’m excited about the fennel. A single organic bulb is around $4.00 at the grocery store, so growing it in the garden saves money. The fronds look like a miniature forest right now.


The cucumber plants are flowering, and one of the pepper plants has flowers and the start of a promised mammoth jalapeno, according to the plant name tag.


The zinnias are getting taller, and are even more vibrant than ever.


I use a watering can and water from the cistern at the bottom of the raised beds to water the plants. Reusing rainwater in the garden means less fresh water is used outside (as long as the cistern contains water; the hose has been used as backup a couple times). I’ve come to enjoy being outside watering and tending to the garden--it’s calming and has made me pay attention to the soil, the progress of plant growth and the condition of leaves/vegetables, and insects that inhabit the raised beds. It's a whole new ecosystem to learn about and explore!

Thursday, April 19, 2012

Water features

One of the rooms in the house that hasn’t been mentioned often—yet gets daily use—is the bathroom. With the bathroom being the top water user in the house, the water features installed here are helping conserve water in several ways.

The New Norris House was built with a rainwater cistern and purification system which delivers harvested and treated rainwater to the toilet tank (and to the clothes washer and outside hose bibs as well). Systems like this aren’t common in the U.S., and the system here is being used under a special permit. According to the EPA, one toilet can use 27% of a household’s daily water, and older toilets use between 3.5 to 7 gallons of water per flush. It makes sense to use rainwater instead of fresh water for flushing given those numbers, since fresh water is a finite resource and harvested rainwater, a naturally replenished resource, works just as well.

rainwater cistern (gray container) and purification system (blue cylinders)
The toilet also has the water saving feature of a low flow/dual flush system (Kohler Persuade model). Either .8 or 1.6 gallons are used per flush depending on which button is pressed. This means the rainwater isn’t used up quite as quickly, but if we lived in a house with standard plumbing, this toilet would be using less pure drinking water for flushing as well. Because I’m living in a house where the rainwater is harvested, treated, and reused, I’ve become more aware of water usage and potential ways to adjust no matter where we live next.


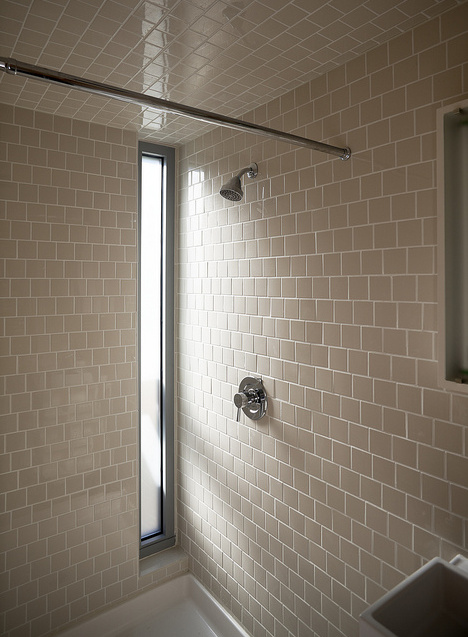
Another bathroom water feature that’s probably more common is low flow fixtures. The shower head and sink faucet are both low flow. “Low flow? I don’t like the sound of that.” Admittedly, neither of us are huge fans of the lack of water pressure with the low flow shower head, but because it can cut water consumption by half, it also makes sense to have it installed in the bathroom. And, to save energy on heating costs, the water is heated with a solar water heating and tankless system.


Besides the water features, the design of the bathroom is worth noting. The same design principles used in the house were applied to the bathroom as well; it’s small but makes efficient use of the space. The room is almost 10’ long, with the stall shower at one end, the sink in the middle, and the toilet at the other end. At its widest on the shower end, the room is 3.5’ wide and at its narrowest on the toilet end is 2.5’ wide. Like the bedroom, it has a pocket door to maximize space. For storage, there is a medicine cabinet, a cabinet under the sink, small shelves on the side of the sink, and a shelving unit above the toilet.


Although it’s a small room, I’ve learned quite a bit about conserving water and energy from living in the house. You can also learn more about our project at www.thenewnorrishouse.com.

Friday, December 30, 2011

Happy New Year!

The year 2011 is drawing to a close, and a short reflection back on our first few months in the New Norris House reveals what we learned and what happened during that time. Similar to any new residence, there was a period of familiarizing ourselves to the house and the systems inside it. Some things in the house were brand new to us (the heating and cooling units, the rainwater cisterns, the solar hot water, and the small refrigerator and freezer), while others were familiar but required an adjustment (low flow faucets and shower, cabinet and storage configurations, and the furniture).

rainwater cistern in backyard (on flickr)
The house was ready for occupancy on July 1, and the finishing touches were completed throughout July and August. We set up our post office box and internet service, and enjoyed meeting people who came by for house tours over the 4th of July weekend. Students wrapped up their work on the yard and rainwater garden, and seeded the lawn. Kinks with fluctuating water temperature in the shower were worked out, and the solar hot water heater was installed. Railings on the deck and entry were leveled and secured. Temperature and humidity sensors were installed throughout the house. We became familiar with the air conditioning unit manual as we figured out the ideal way to run the systems in the summer heat.

the house in december (on flickr)
The official ribbon cutting ceremony for the house was in August, and hundreds of people attended and toured the house. Also that month, there were multiple media events to promote the finished project within the Norris and Knoxville areas, and at the University of Tennessee as well. Professors Tricia Stuth and Bob French, along with the student researchers and other student participants, have been a pleasure to work with during this experience. We've appreciated their patience with us while we went through learning about the house.

In the next six months, we’re looking forward to some new activities, including starting a garden in the raised beds in the backyard and exploring more of the Norris area. Until then, we wish you a Happy New Year!

Monday, October 17, 2011

Phase IV Water Monitoring


Now that our water systems are up and running, it's time to begin the monitoring and analysis process. My task as a graduate assistant is to formalize a sampling and analysis protocol for testing water quality on both the supply side and the waste water side.

A little about me: My name is Valerie Friedmann and I am in my third year of studies as a graduate student in landscape architecture at UTK. My role in the New Norris House project began as a landscape architecture student consultant in the spring of 2010. I began by refining the conceptual landscape design, and continued working on the project to see it through the construction and installation phases. Last summer, I worked with a group of UTK students to finalize construction documents, order materials, and construct the landscape elements. Now that our landscape system is online with the home's rainwater overflow and greywater discharge systems, I am very excited to determine the efficacy of the landscape systems in mediating the quality of the greywater and the flow, velocity, and erosion potential of the rainwater.

Back to the monitoring process:

On the water supply side, our design includes a rainwater harvesting system that collects rainwater from the roof of the home and stores it in a 400 gallon cistern. The water is filtered and treated with UV and used for non-potable sources in the home. We have a temporary permit to allow rainwater to be used in the home, and we are testing to compare the rainwater composition pre- and post-treatment to the City of Norris municipal water supply.

Our goal is 01) to learn if the rainwater quality we are collecting and treating would produce water that is safe for use as a potable source and 02) how the water quality compares to the city's water quality. The City of Norris revised its ordinances to allow the systems to work and be plumbed as such in the New Norris Home while UTK owns the home. Results may allow extension of the permit to a future owner, and perhaps other town residents. A second test we are interested in concerns the greywater. We have designed and installed a greywater treatment garden, and we would like to sample the greywater as it leaves the house and at various distances from where it enters the greywater treatment bed. The goal here is to see if pollutants from the greywater are successfully being mediated in the bed. We currently have a temporary State Operation Permit from the Tennessee Department of Environment and Conservation (TDEC) that allows us to collect, treat and release greywater in the beds; this will expire after three years or when UTK sells the property. TDEC has been very supportive and is interested in the results of the study and its potential to effect future state policies.
Image Credit: Ken McCown

We are currently working with TDEC officials and UTK professors from the Department of Biosystems Engineering to develop our testing protocol for both rainwater and greywater analysis. I will be posting updates on our process and results throughout the semester, so stay tuned!

Sunday, September 11, 2011

Summer Landscape Mini-Term Recap

What a summer! Even though it was a HOT, muddy, dirty process the time spent building the New Norris House landscape is one that I will always remember fondly. I even miss the manual labor, but maybe that's because I'm in an air conditioned room right now...

During the landscape mini-term we accomplished so much. We finished building and installed plants on the terraced bioretention beds.

We excavated for, and built, the raised vegetable beds and installed the 200 gallon irrigation cistern.


We successfully installed the stormwater overflow from the irrigation cistern to the bioretention beds and installed the pipe that brings the house's greywater into the greywater bioretention bed. We also built a gravel plinth for forest-side seating, installed over 200 linear feet of aluminum bed edging, dug beds for the perennial plantings, worked with a local contractor to finish the site grading, installed a stepping stone path connecting the sidewalk to the existing walking trails behind our property, weeded, watered and installed erosion control measures.


Some of us even got a lesson in how to operate landscape machinery!


So far, the plants are doing fantastic. The bioretention beds are lush and the perennial beds are off to a great start. We have plans for native shrub and tree planting in the fall, but for now it is so nice to be able to see what started as just an idea on paper growing and thriving in reality. Thank you to everyone who helped make the mini-term such a huge success!

Wednesday, April 27, 2011

Rainwater System

I am pleased to announce that our rainwater system, although dry as a bone currently, is physically in place. Many thanks to our sub-contractors with Scott's Plumbing who have been hard at work for the past 3 days to complete the installation.

Several items still remain to be completed, however, before we can start washing clothes and flushing toilets with reclaimed water. First, the gutters need to go on. Second, city ordinances still need to be officially adopted that make what we are doing legal in the City of Norris. And third, the system needs to be primed and commissioned!

We are estimating this work to be done by mid-June. The legal process to adopt new city ordinances requires several readings and subsequent approvals, as well as a final public hearing.

Installation in progress. Cistern [bottom left], pump and controller [middle], and filters [right]

Multiple water meters installed in-line will allow us to measure how much rainwater is used in the house and how much city water had to be supplied to supplement. Other important factors include total rainfall (used to calculate how much rain passed through the system and was diverted as storm-water), as well as the total city water use (to indicate how much water was used specifically by potable fixtures.

Thursday, February 3, 2011

Putting the "New" in New Norris House

I should begin by saying that I am one of the new additions to the New Norris House team. With only a handful of on-site experiences under my (shiny new tool) belt, these first few weeks have mostly involved familiarizing myself with the project and learning the processes through which business is conducted. However, once the initial excitement, and at times confusion, of this new endeavor wore off, the broader implications of the project were brought to light. I was beginning to see the New Norris House as a great opportunity whose benefits stretch far beyond the academic.

What immediately impacted me was the number of hands coming together for this common purpose. Not only have students assembled from various architecture, landscape architecture, and interior design studios; but graduate students, faculty, contractors and subcontractors, and a number of people from the Norris community have all contributed to the cause. While interdisciplinary collaboration is imperative to the execution of this design, it also creates a few complications in terms of scheduling and project management. Each individual must do his part for the whole operation to run smoothly.

The focus of my efforts have centered on the greywater system. As rainwater hits the roof and falls into the Galvalume gutters, it runs along a very "custom" path that penetrates the building envelope and feeds into the cistern [pictured below] for filtration and storage. The main issues with detailing this indoor downspout involved keeping a continuous, water-tight seal at the point of penetration and along the length of the channel. With so many measures taken to keep a tight building envelope, the smallest break could negate our entire effort. Therefore, every opening we make must be carefully enclosed to ensure optimum comfort and energy efficiency.


Monday, November 1, 2010

Happy November!

After a week of rain, it was back to work for Team Norris. Down at the wood shop, the better half of Team Norris was busy priming the siding and putting the last touches on the windows. Out on site, the other half of Team Norris installed insulation under the house and began the cistern enclosure. Here, the gang learned a lesson in one of the downfalls in prefabrication. The cistern was previously build by students last semester, but plans and drawings of the design have changed since them. Although we appreciate prefabrication in all of its glory, much of today was spent taking apart prefabricated panels, re-fabricating them, and then installing them correctly. Because so much time was spent redoing the panels of the cistern, we didn’t get to finish. But that’s ok because we can finish on Wednesday and it is going to look awesome, like always. In other news, the plumber and the electrician were also on site to discuss some details in their line of work. We look forward to finishing up the cistern and installing some siding and windows in the new few weeks!